
Lemonade Concentrate (Canning Recipe)
Fresh lemonade is a staple in our home, and not just because it tastes like summer in a glass. Lemons are naturally rich in vitamin C and citric acid, which support digestion and help the body better absorb minerals. They’ve long been used to gently stimulate appetite, balance heavy meals, and add brightness to otherwise simple foods. When you’re making lemonade at home, you’re getting all of that without the artificial colors, preservatives, and flavorings that dominate most store-bought lemonades. (yes there is still sugar… but its a fantastic treat!)
This recipe has become a true family favorite in our house — simple, refreshing, and endlessly adaptable. Because it’s canned as a concentrate, it takes up very little pantry space and can be diluted to taste whenever we want a glass. It’s just as good with ice-cold water in the heat of summer as it is stirred into warm water on a cold morning.
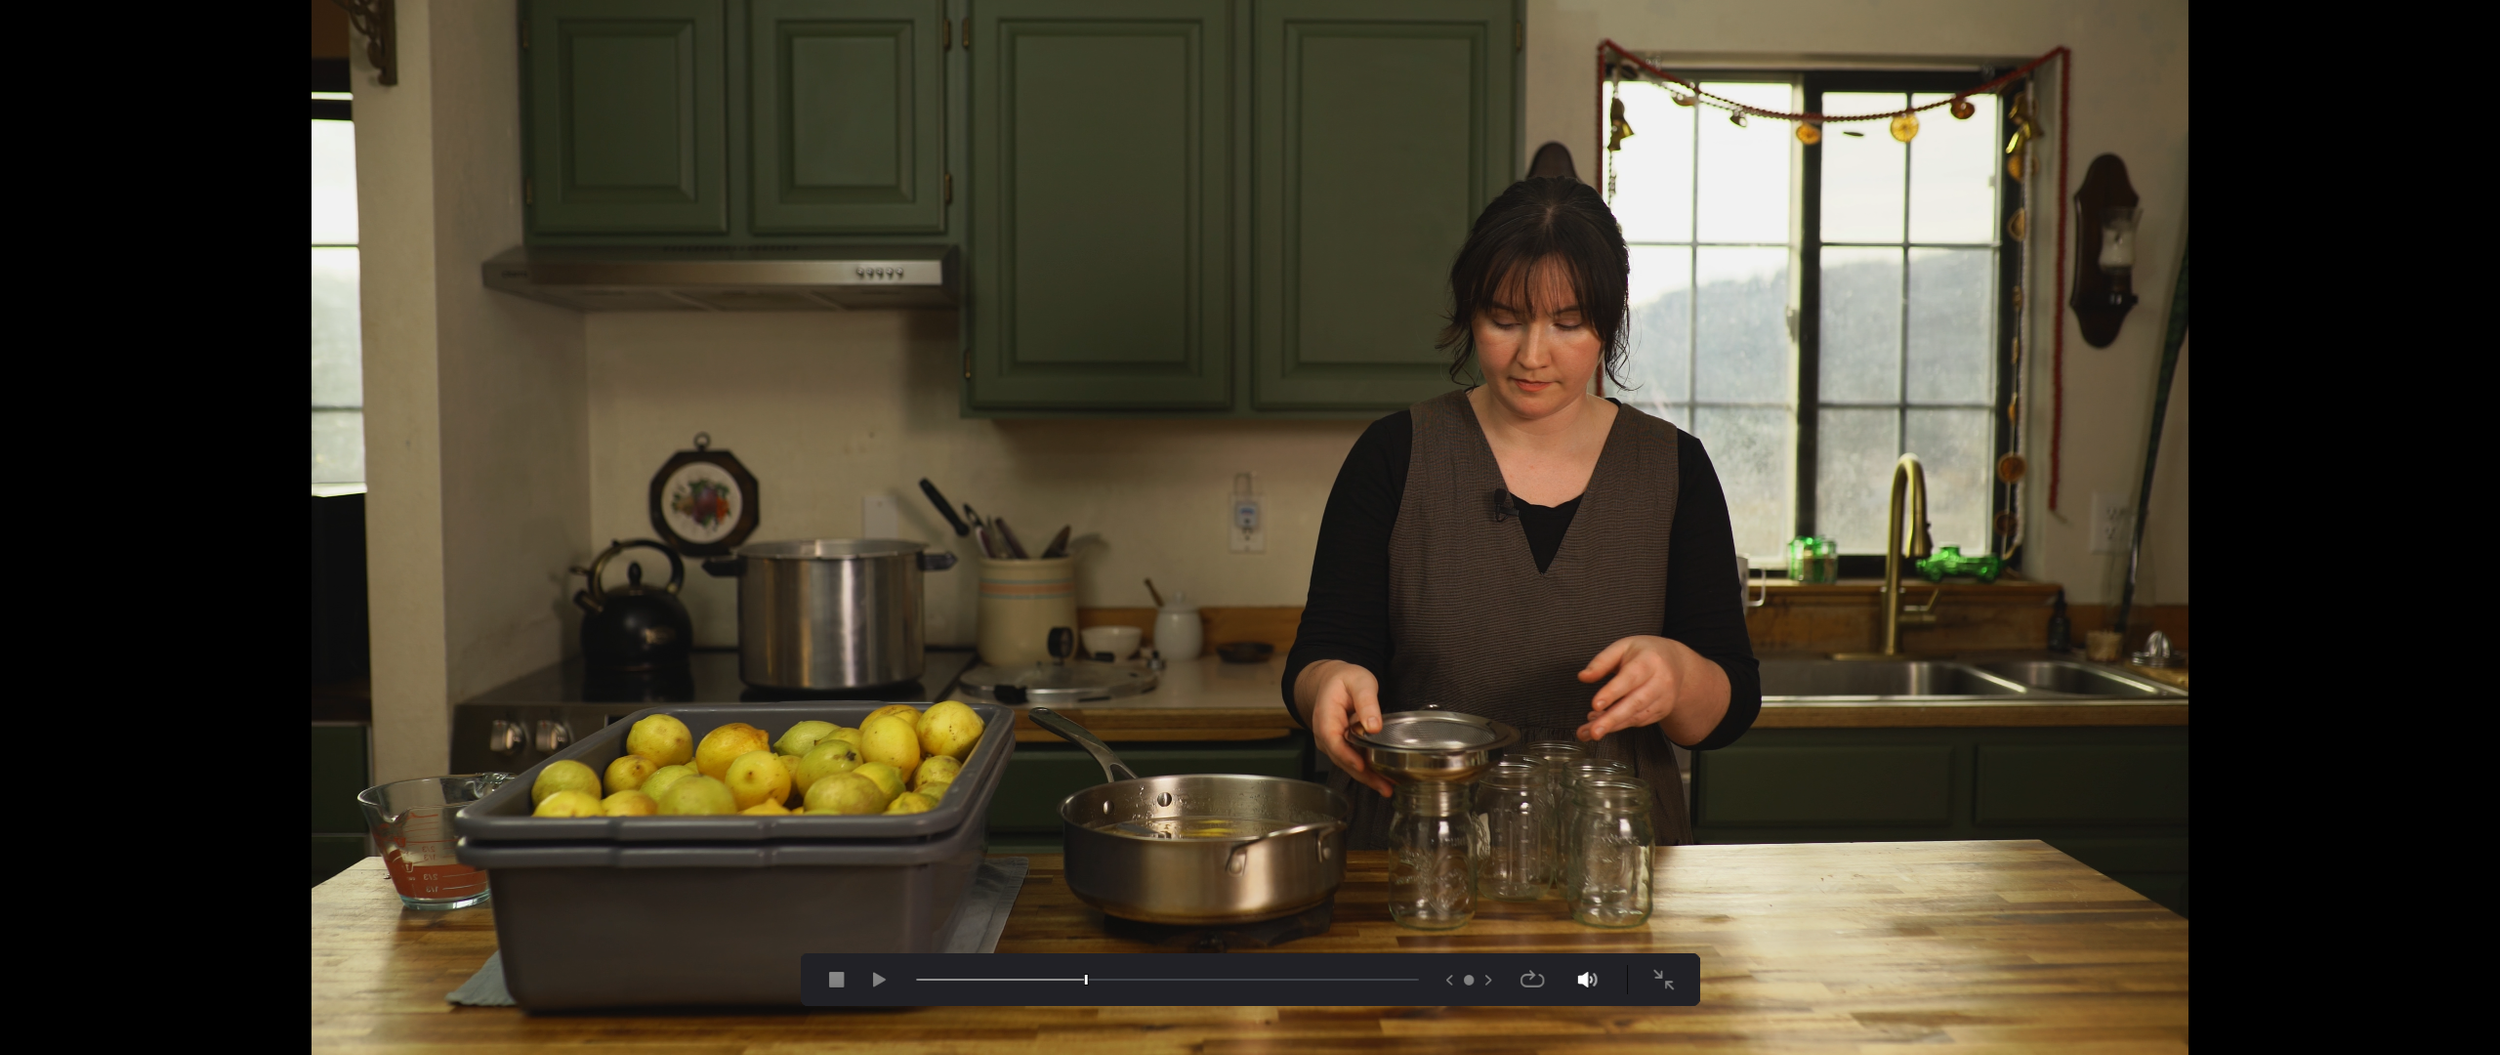
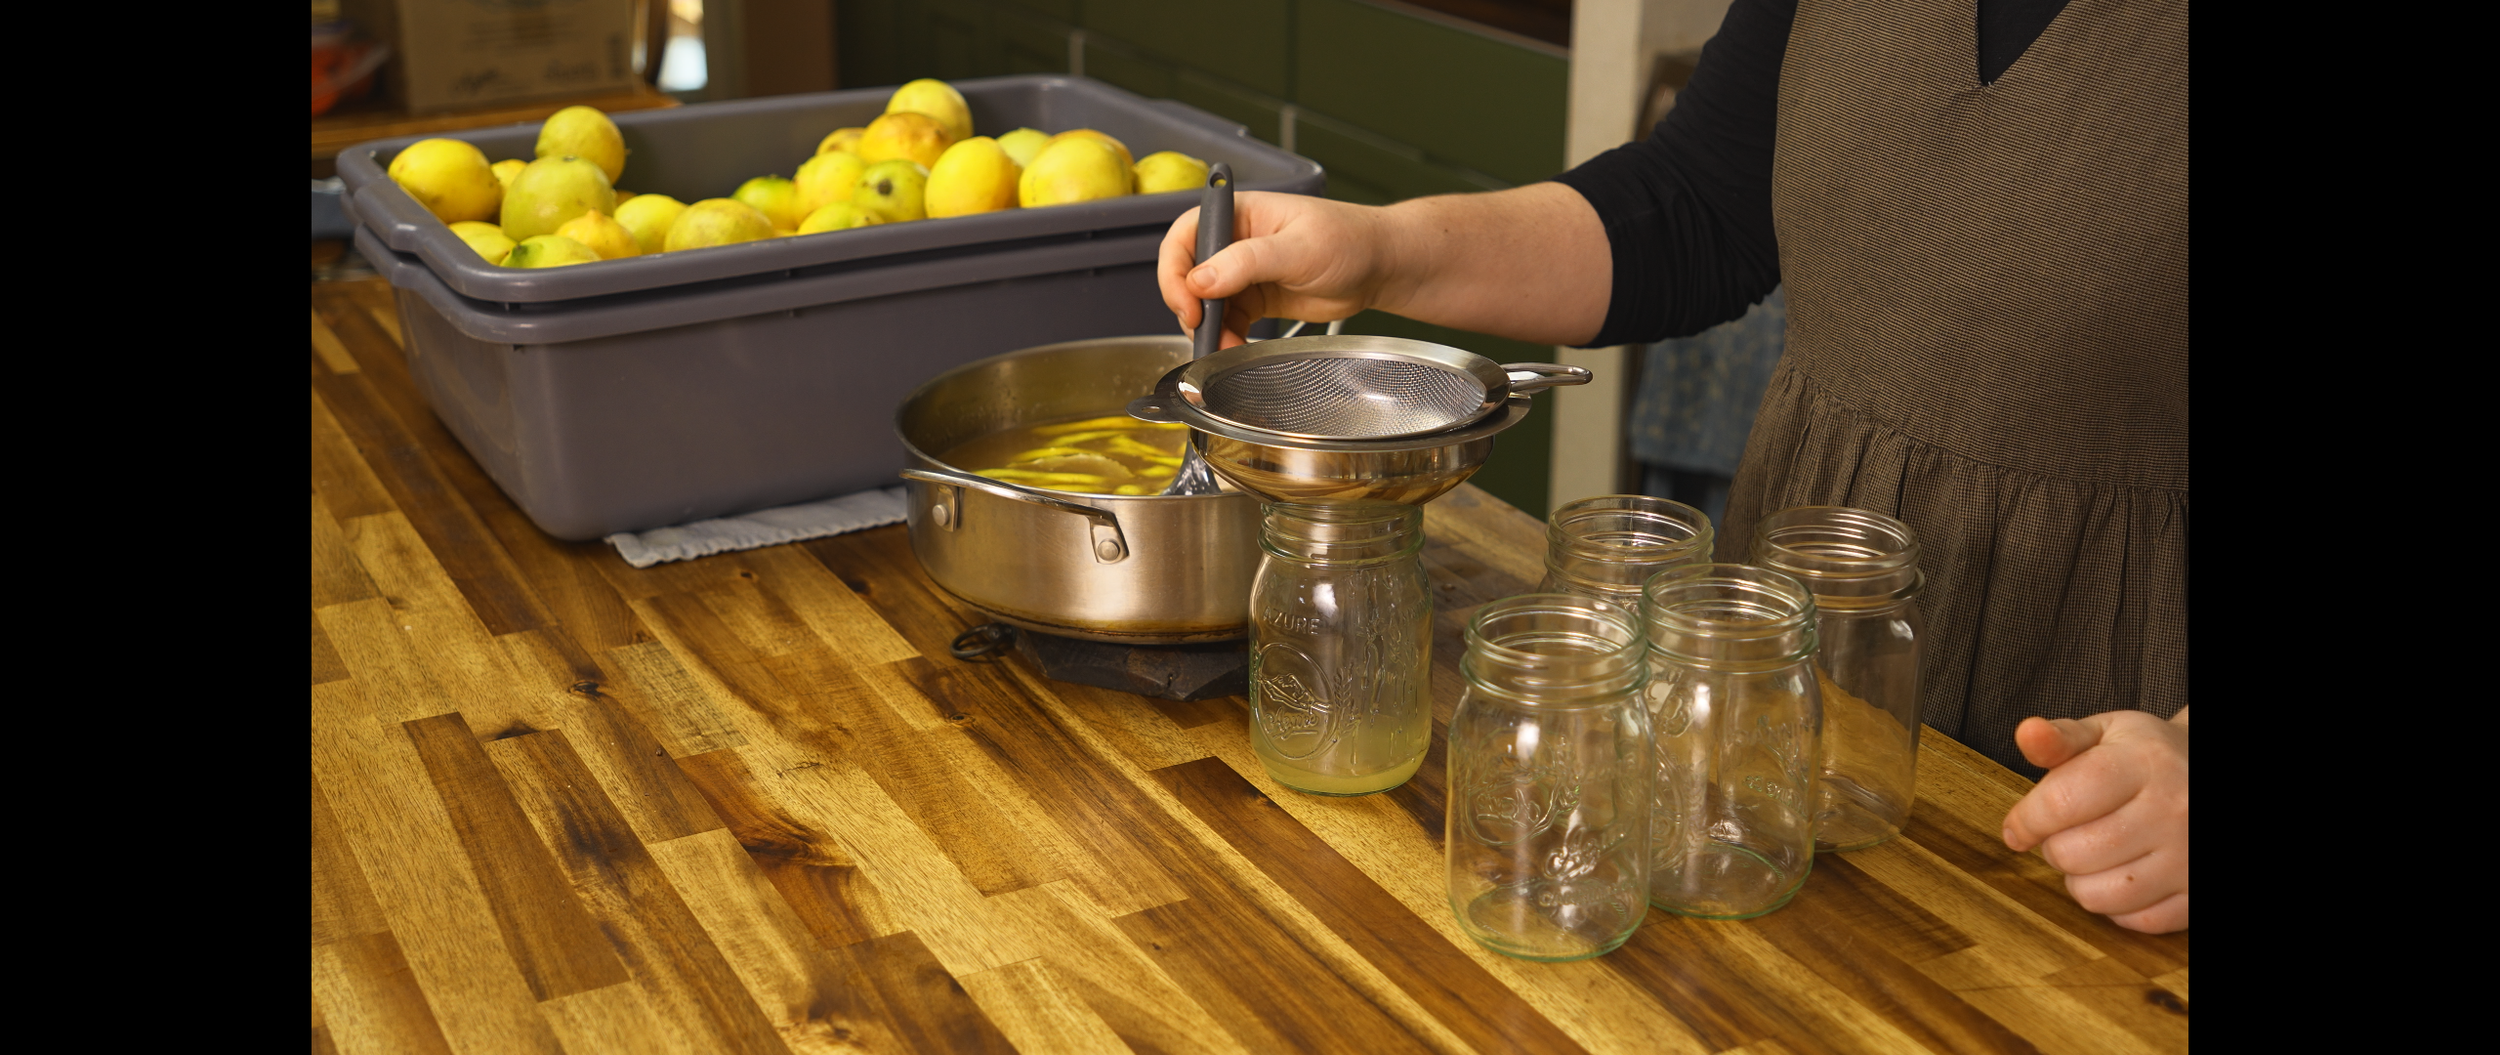
Winter is actually the best time to put lemonade up for the year. Citrus is at its peak, prices are lower, and the fruit is often far better quality than what’s available in summer. I usually buy a bulk box of lemons from Azure Standard when they go on sale and spend a few afternoons turning them into shelf-stable lemonade and dehydrated slices for the pantry. If you’re ordering through Azure for the first time, you can use my discount code PATIENCE15 at checkout — but any good, fresh lemons will do.
You may can this recipe either as a concentrate (to dilute later) or as ready-to-drink lemonade. Both methods are safe for water bath canning when the proper ratios are followed.
Lemonade Concentrate
Ingredients
1 cup fresh lemon juice
1 cup sugar
This is simply a lemon juice simple syrup made with equal parts lemon juice and sugar by volume.
Sugar is not required for preservation. You may adjust it to taste or substitute honey or maple syrup if desired. Do not reduce the amount of lemon juice.
Instructions
Prepare the sugar (optional but recommended):
Zest several lemons and add the zest to the sugar. Let it sit while you juice the lemons. This helps pull out the lemon oils and adds depth of flavor.Juice the lemons:
Measure out the lemon juice. Use only fresh lemon juice for this recipe, bottled will not have the same wonderful flavor.Combine and heat:
Combine the lemon juice and sugar in a saucepan using a 1:1 ratio by volume.
Heat gently, stirring just until the sugar dissolves.⚠️ Do not boil. Lemons are naturally high in pectin, and boiling can cause the mixture to gel.
Strain and jar:
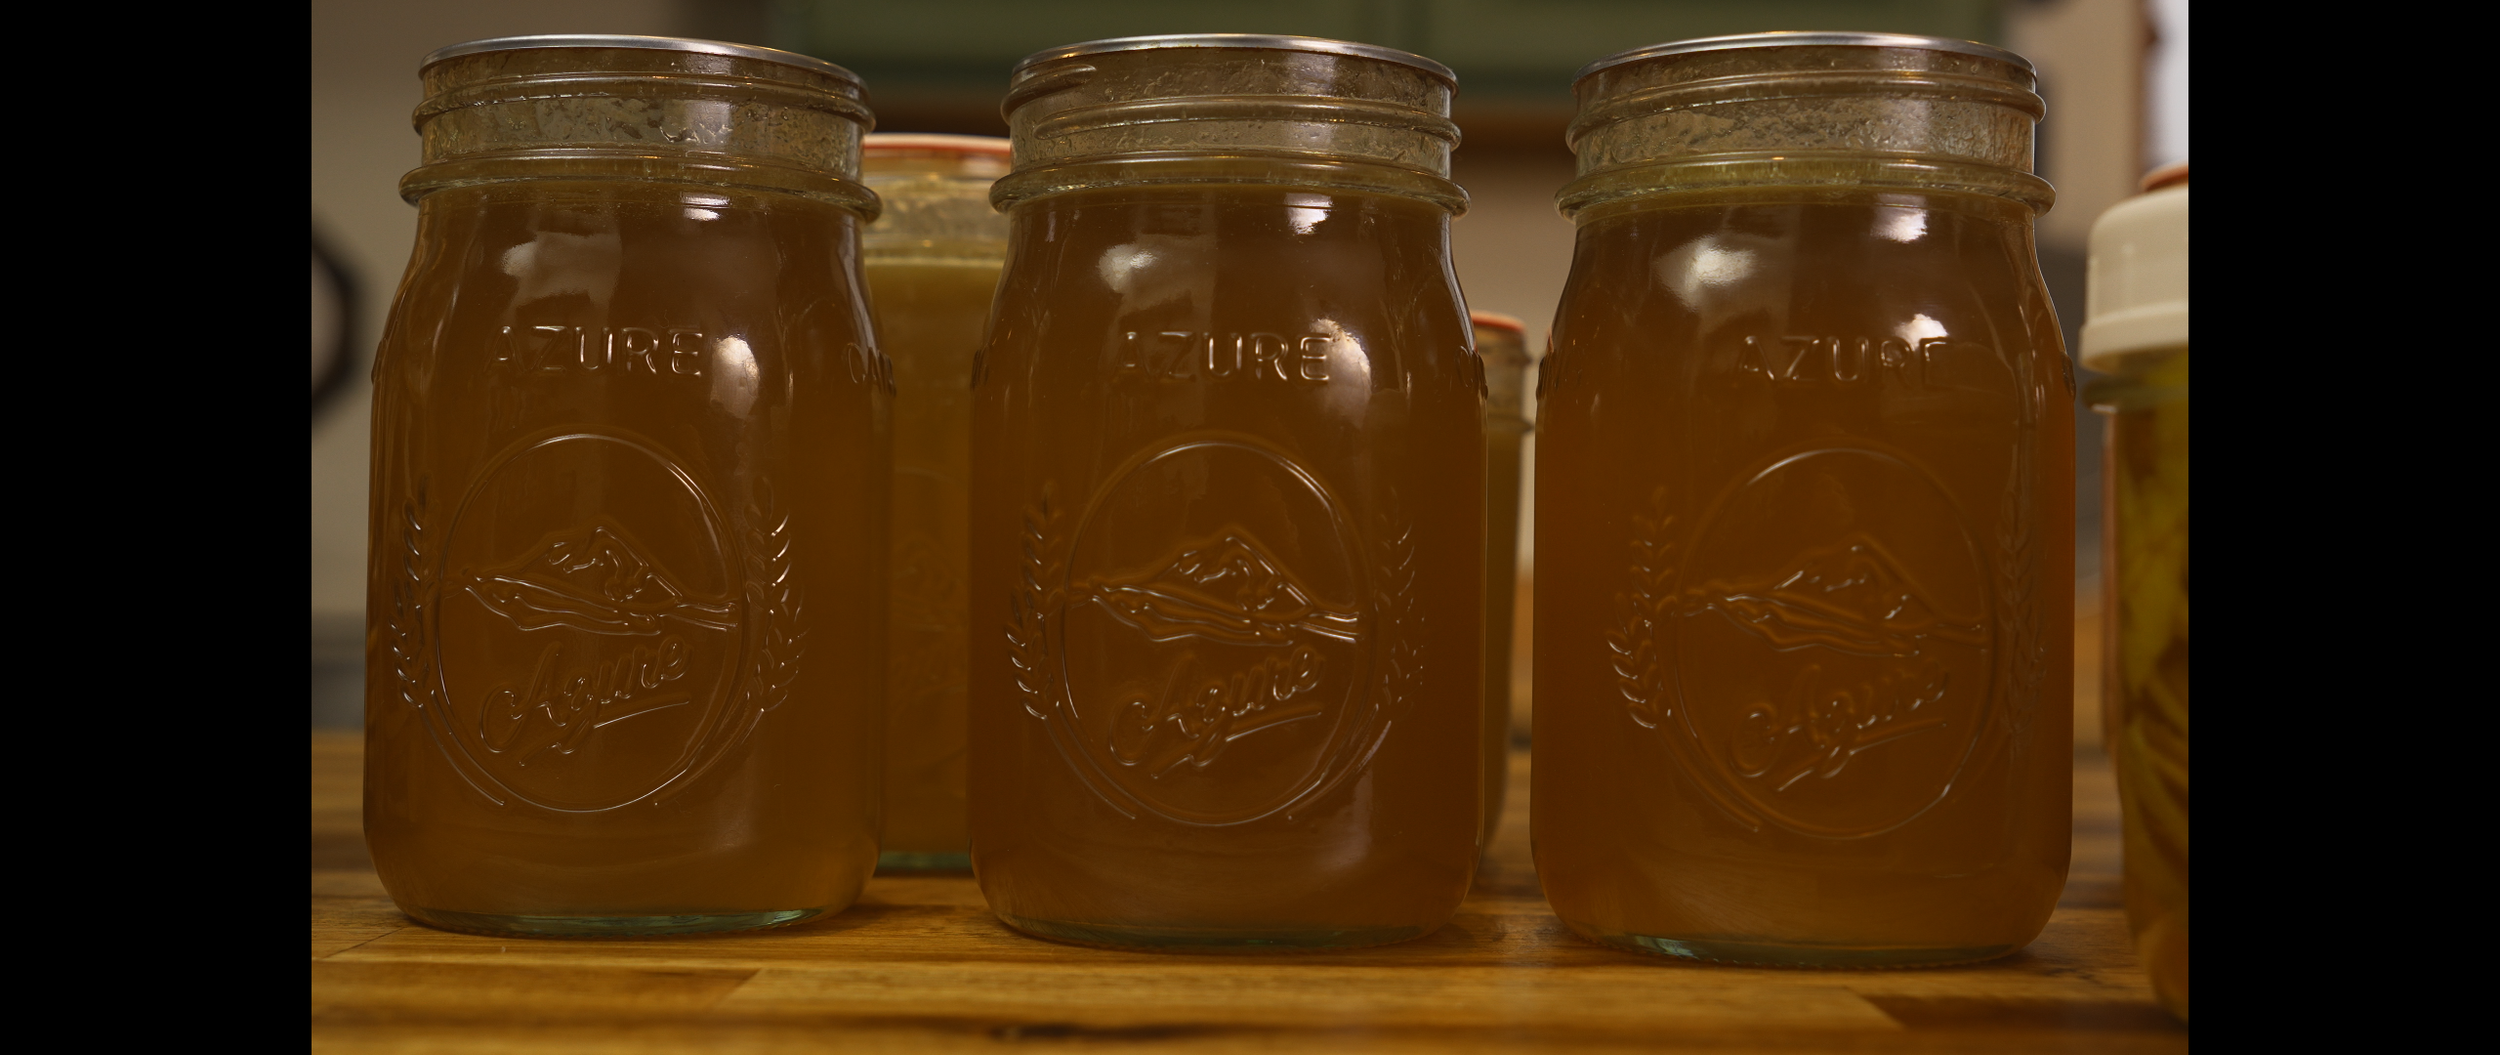
Strain out the zest and pour the hot concentrate into clean jars, leaving ¼ inch headspace.Seal and process:
Apply canning lids and process in a water bath canner:Half pints, pints, or quarts
Below 1,000 ft: 10 minutes
1,000–6,000 ft: 15 minutes
Above 6,000 ft: 20 minutes
How to Serve
Dilute to taste. A good starting point is:
1 pint lemonade concentrate
10–12 cups cold water
Adjust sweetness or dilution as needed to suit your tastes.
Ready-to-Drink Lemonade
If you prefer lemonade that’s already diluted and ready to pour, you may can it that way too. This may be particularly helpful if you like to have water on your shelves for emergencies. You could also have ready to drink lemonade in case of emergencies, which would be a nice treat!
Ingredients
1 cup fresh lemon juice
1 cup sugar
6 cups water
Instructions
Combine lemon juice, sugar, and water in a saucepan.
Heat gently, stirring until the sugar is fully dissolved. Do not boil.
Pour into clean jars, leaving ¼ inch headspace.
Seal with two-part lids and process using the same water bath times listed above.
Notes
When canning lemonade, you must maintain a minimum of ¼ cup fresh lemon juice per pint jar
2 tablespoons per half pint
½ cup per quart
You may adjust or substitute sweeteners, but never reduce the lemon juice.
If you’re new to canning or looking to upgrade your setup, I keep a running list of my trusted canning supplies and educational resources in one place. You’ll find recommendations for jars, lids, tools, and further reading to help you build skills and confidence in the kitchen. You can find all of that on my Canning Resources page — it’s a great place to start if you’re stocking a pantry or brushing up on the basics.